How to draw a simple Celtic knot #3 – Level I difficulty
How to draw a simple Celtic knot #3 – Level I difficulty
What you will need
A pencil
Paper to draw on
Colored pencils
Starting our drawing
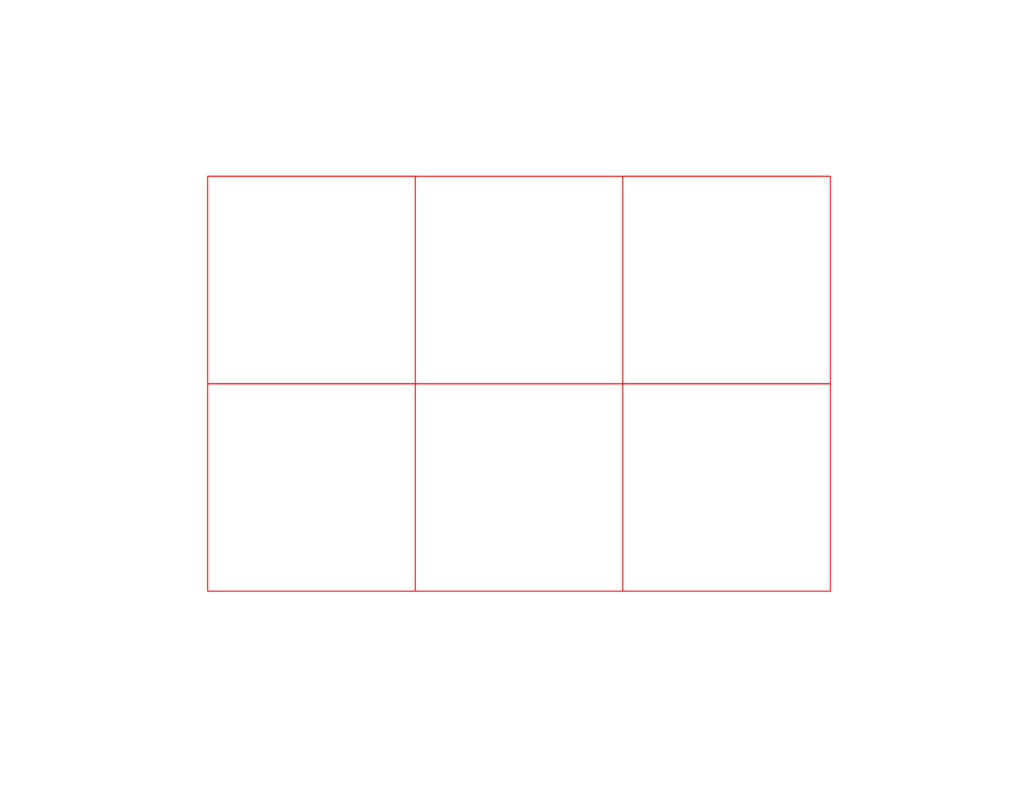
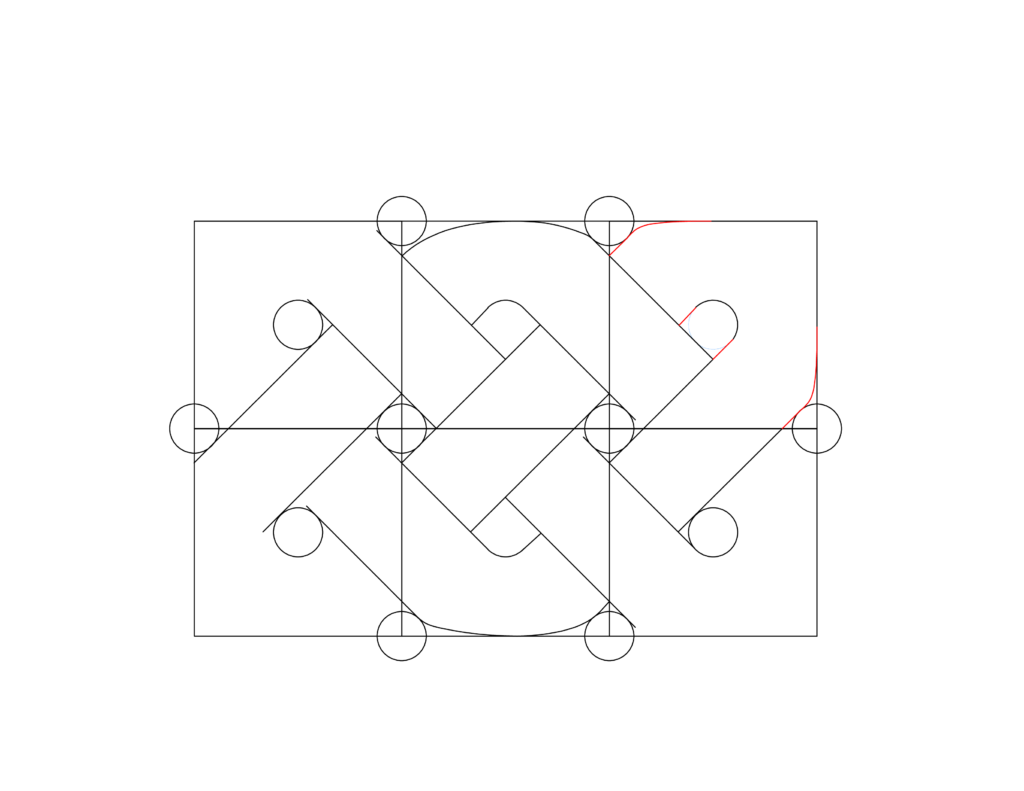
- First thing first, draw six equal square on the page. Almost all of these lines will be removed later, so draw them lightly. In each one of our steps, the new additions will be shown in red and any lines we are removing will be shown in blue.
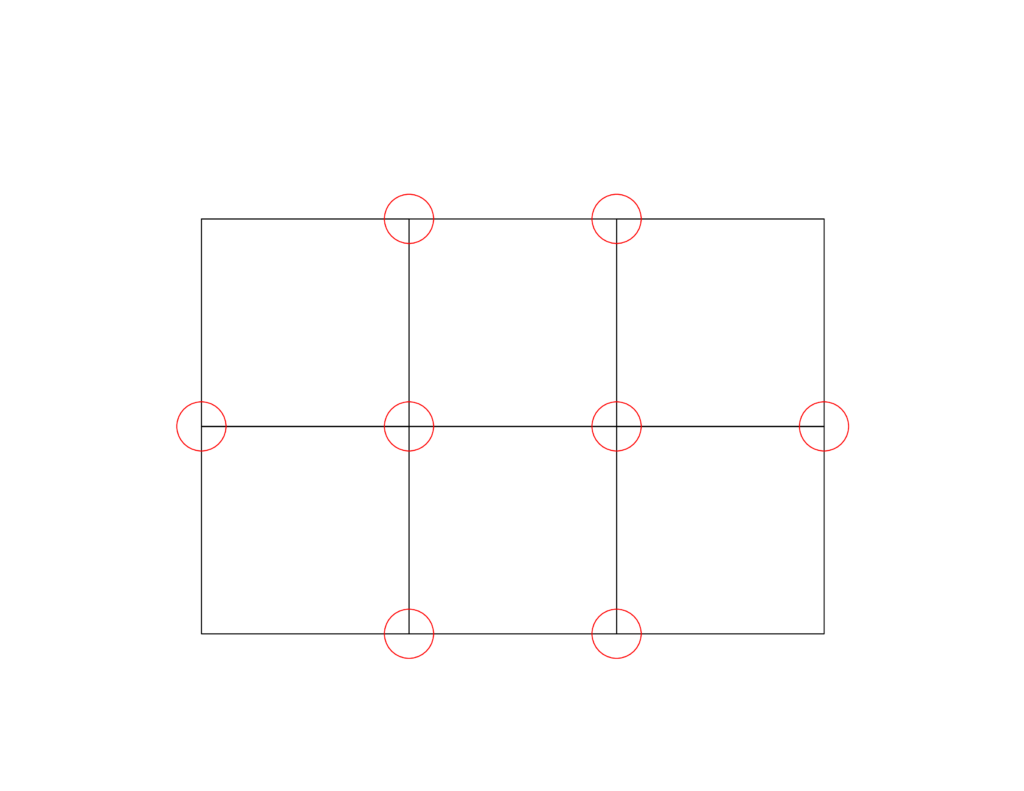
- Next step is to draw circles where all lines intersect. Do not draw small circles.
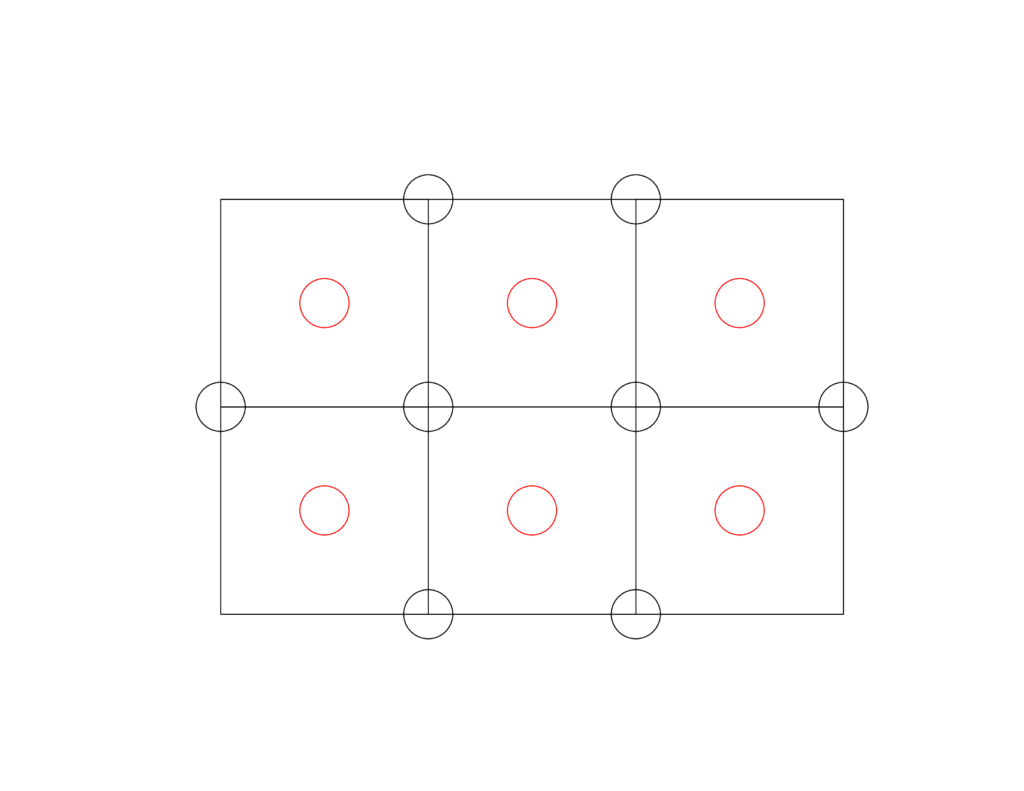
- Now we will draw more circles in the center of all the squares. Make sure these circles are the same size as the other eight circles you drew before.
- We will now add in some parallel lines. For now, just draw the two sets of parallel lines we drew. Show the lines tangent to the existing circles and perpendicular to each other.
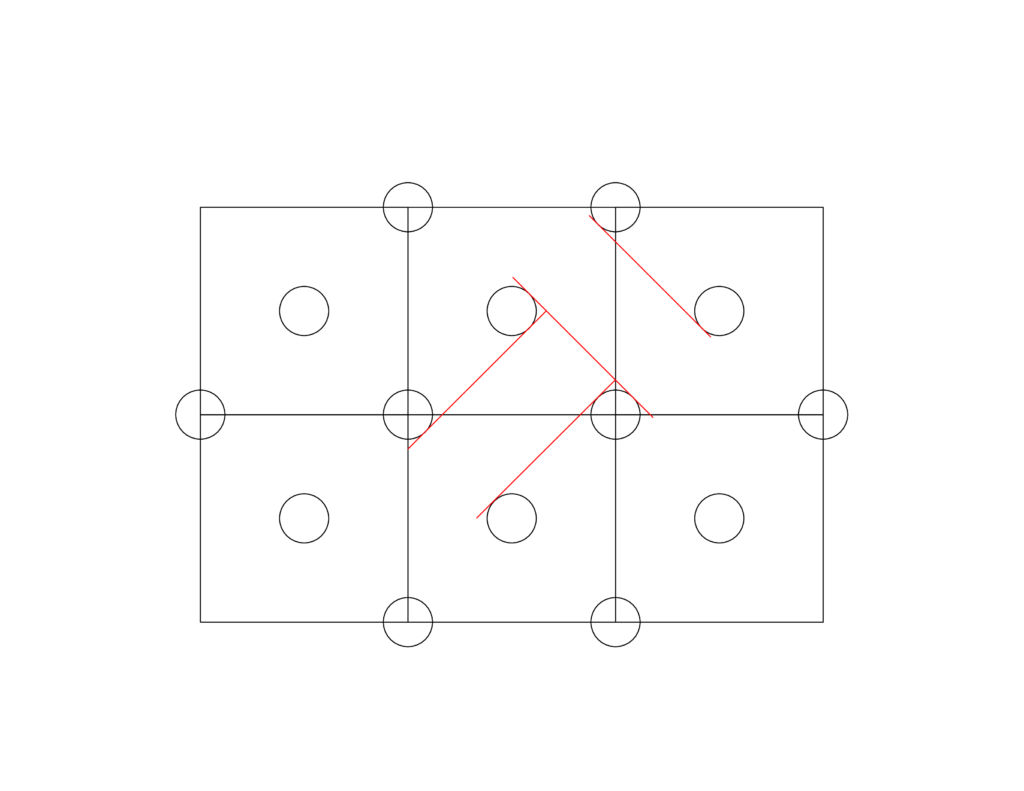
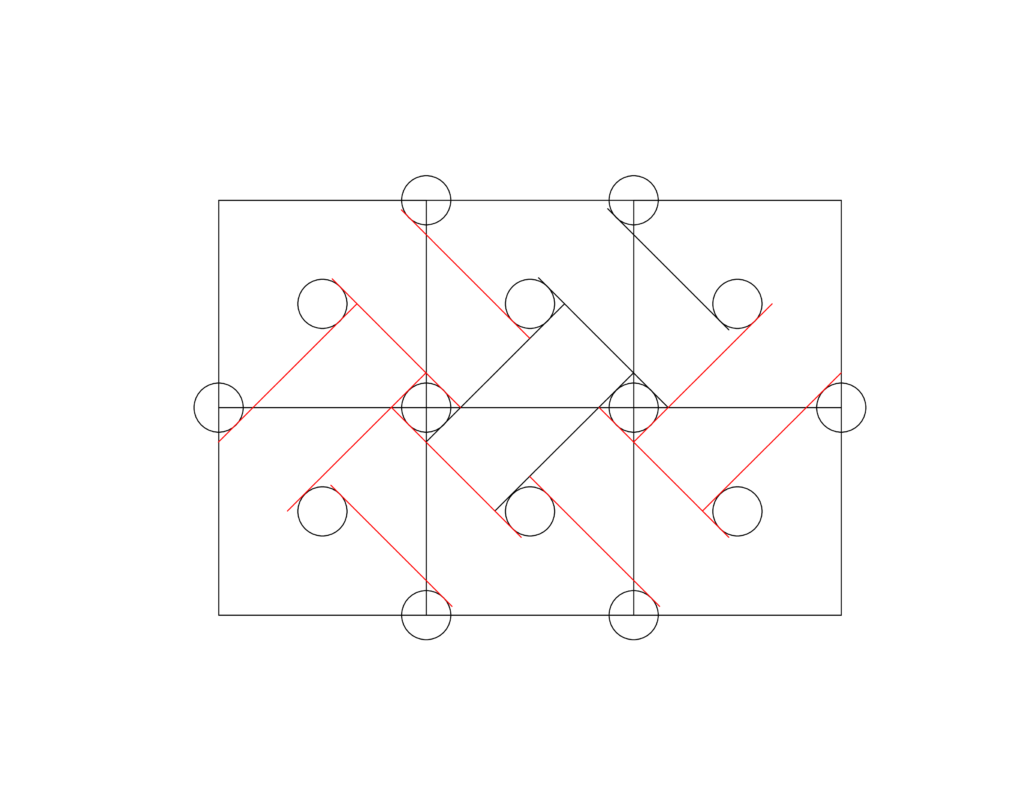
- Repeat the last step through the rest of the drawing. Use our drawing for reference.
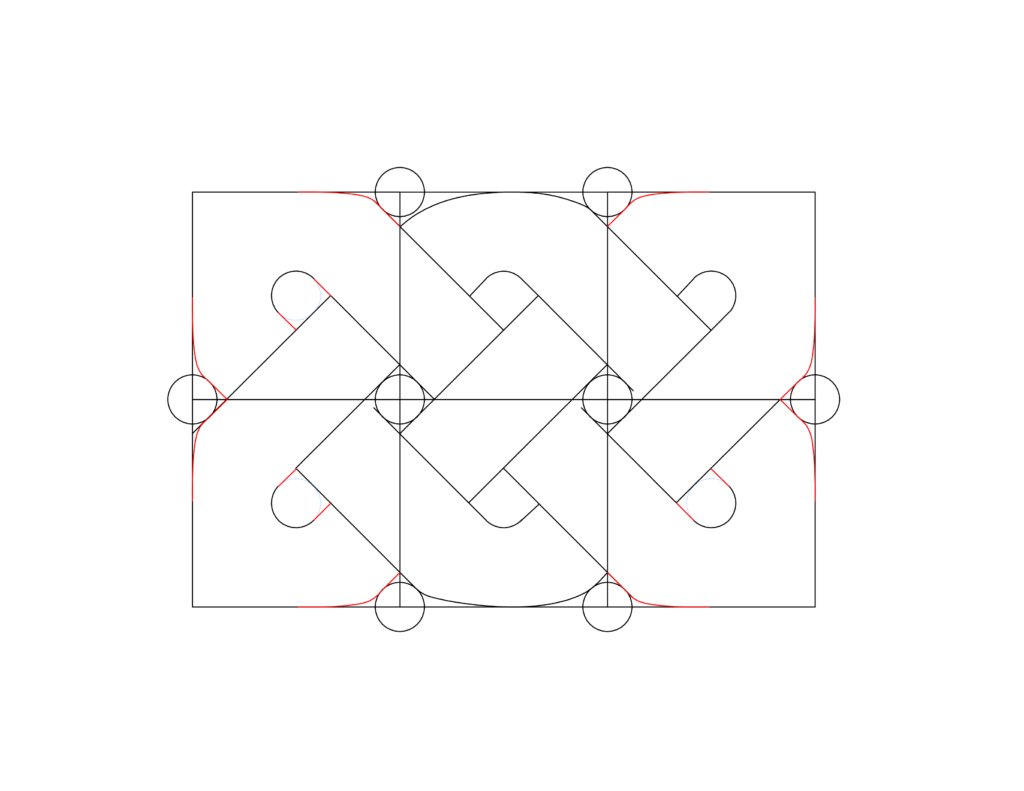
- We are going to start rounding out our drawing. Draw an arc on the top middle square. Remove the lower half of the top middle circle as shown in blue. Add in two small lines on either side of the circle.
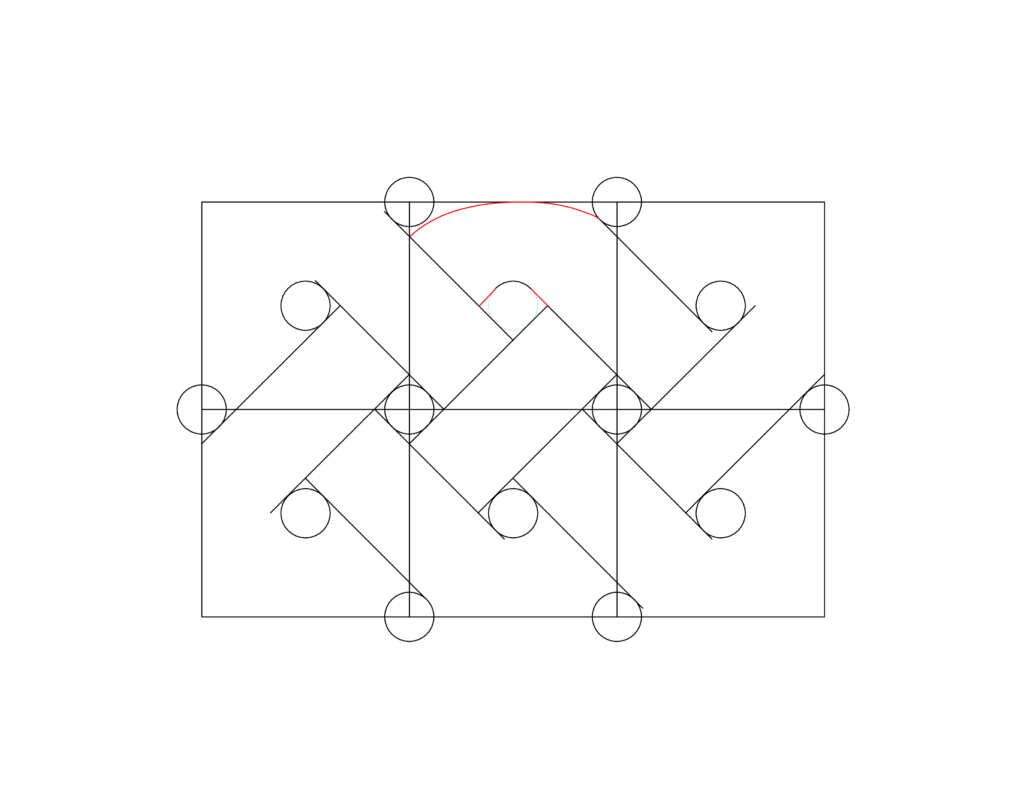
- Repeat the last step on the bottom of the drawing. Add another arc and change the circle.
- Now we are going to work on our first corner. Remove the bottom have of the circle as shown in blue. Add in two small lines off the circle to join the top arch. Round off the corners of the drawing as shown.
- Repeat step 8 with the rest of the three corners. Use our drawing for reference.
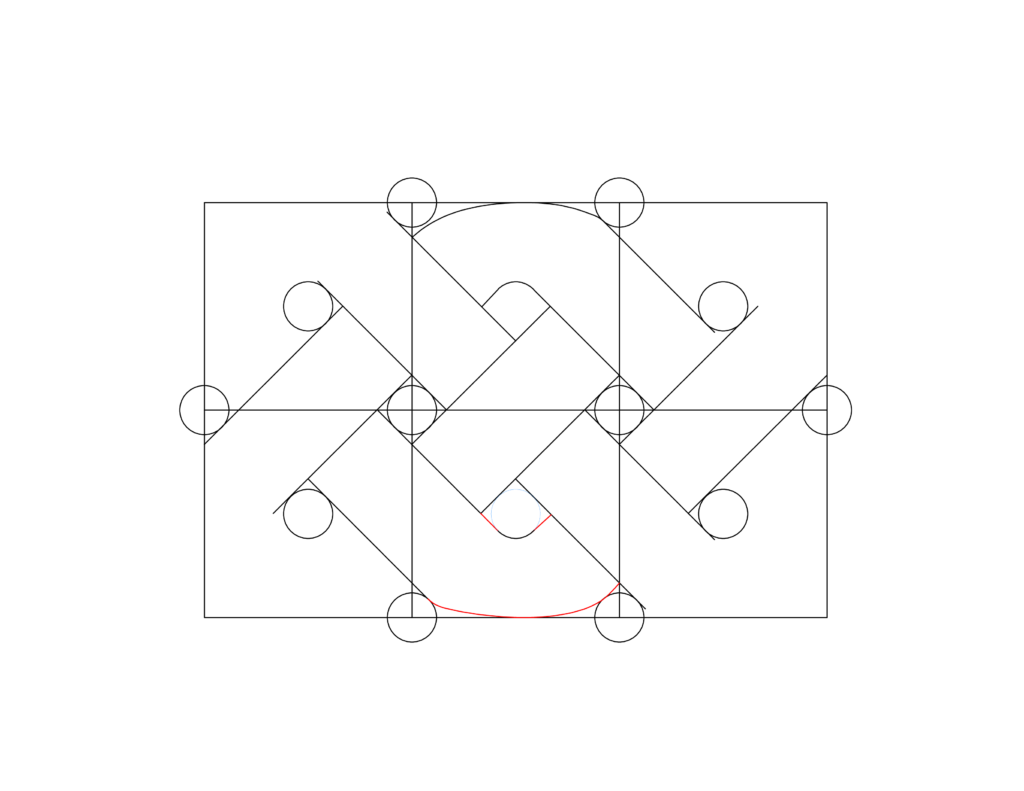
- Our next step is starting to remove unnecessary lines. We start by removing the unnecessary circles. Remove all the circles at the joints.
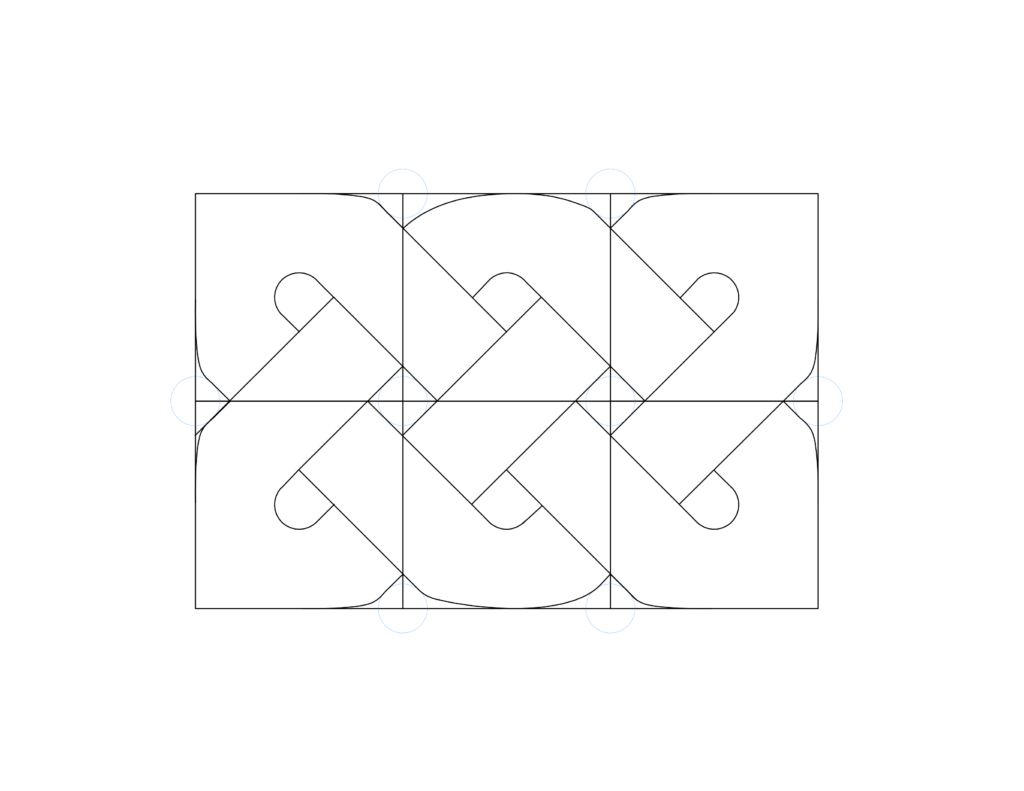
- Now we remove the rest of the constructions lines.
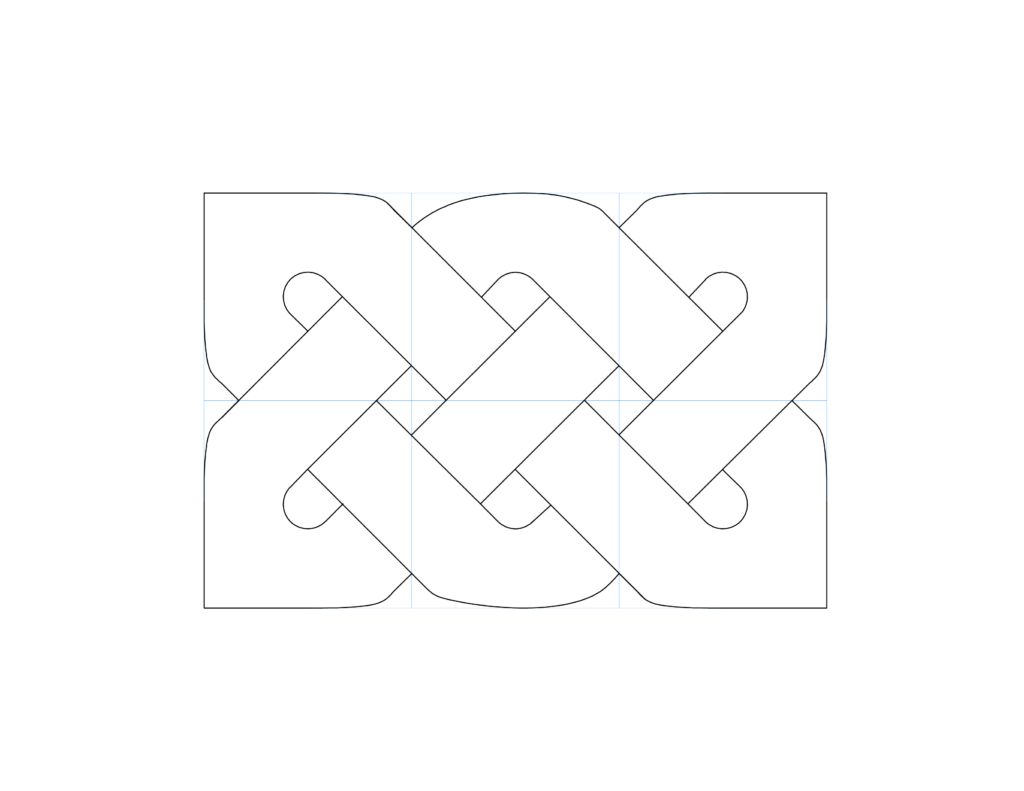
- We are done! Enjoy your work!

Are you interested in more drawing tutorials? Click any of the links below.

 Previous Post
 Next Post