How to draw Pokémon Whismur in 10 steps
How to draw Pokémon Whismur in 10 steps
What you will need
A pencil
Paper to draw on
Colored pencils
Starting our drawing
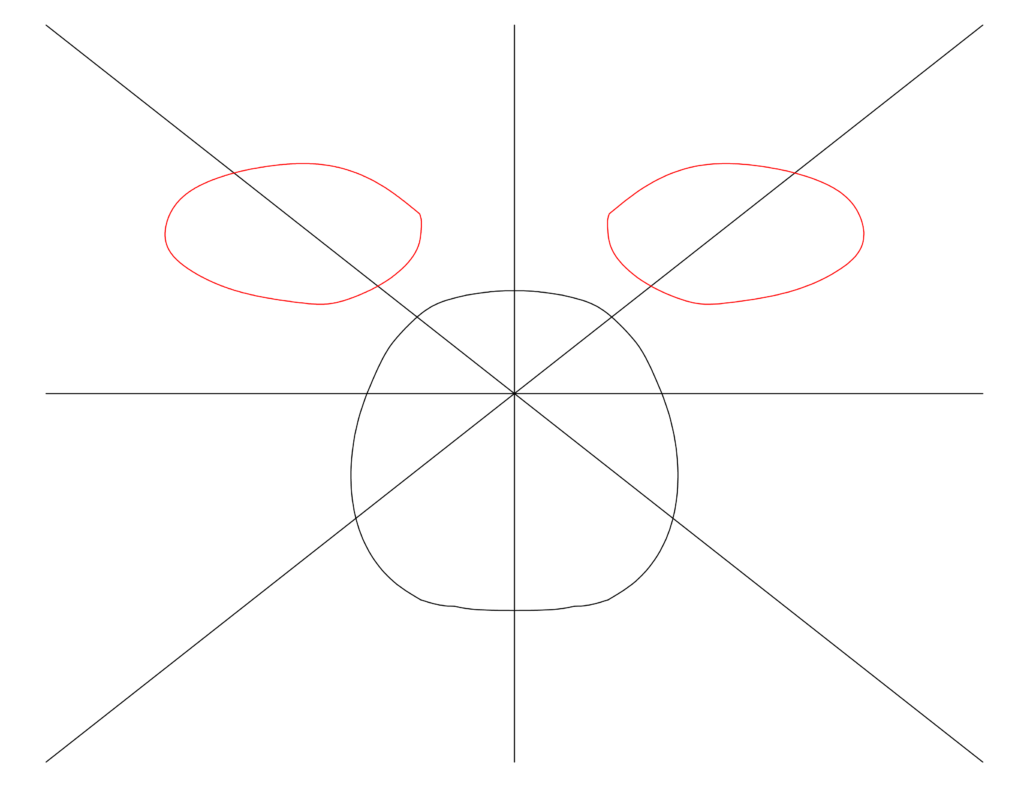
- First thing first, draw four construction guidelines. One down the center of the page, one horizontal across the middle and two diagonal lines. We will be erasing this line later so don’t make it too dark. This line will help us to make sure our Whismur is symmetrical.

- Next, let’s just start on Whismur’s body. Whismur’s body is just a simple circle. Since ours is screaming, we will make the body a little wider near the bottom. Don’t worry about any overlapping lines. We will be removing any unnecessary lines later.

- Now we will add in Whismur’s ear flaps. Start by showing two oval shapes on either side which will be slightly elevated from the body shape.
- To wrap up the ears, we will show a couple of lines on either side to attach the ovals to the body. Draw two lines on either ear connecting them to the body.

- Mouth is next! Use the guidelines to help draw the mouth. The center top of the mouth is right where all the center lines meet. Our Whismur is screaming with his mouth open.
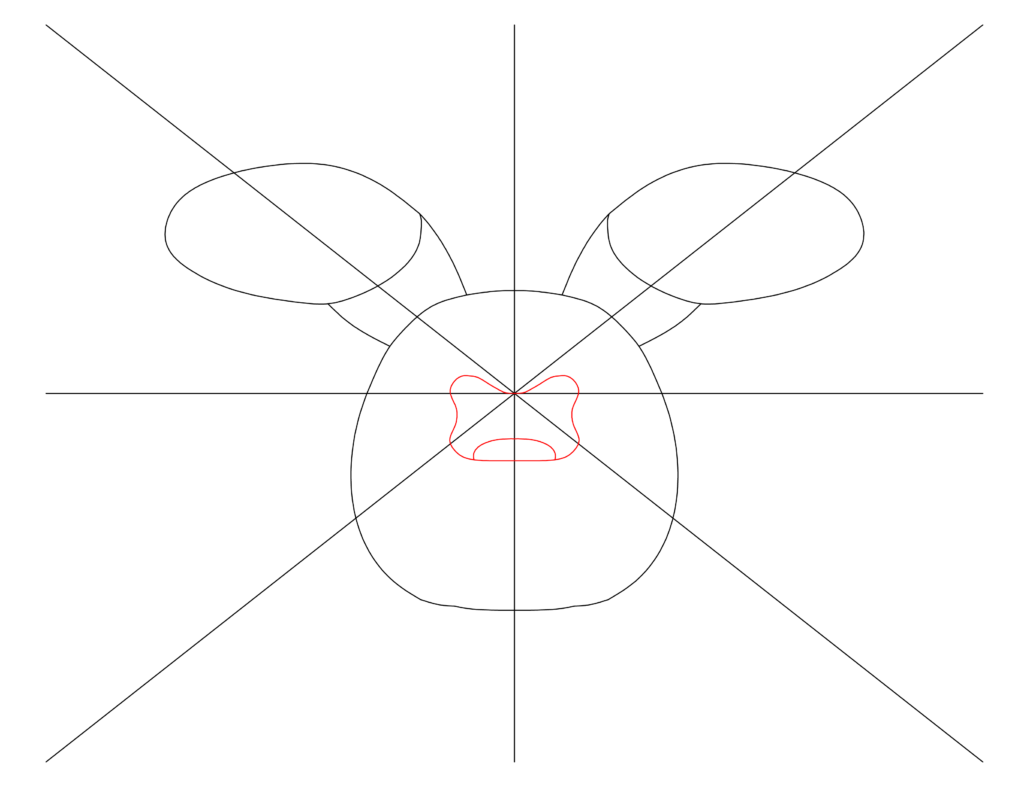
- Now we can add Whismur’s eyes and ear holes. They eyes are just four little ovals in a cross like pattern. The ear holes are also little ovals; just slightly larger than the eyes.

- Now we can add in Whismur’s hands. Use the guidelines for placement. Whismur doesn’t have any fingers. Just draw upside down loops.
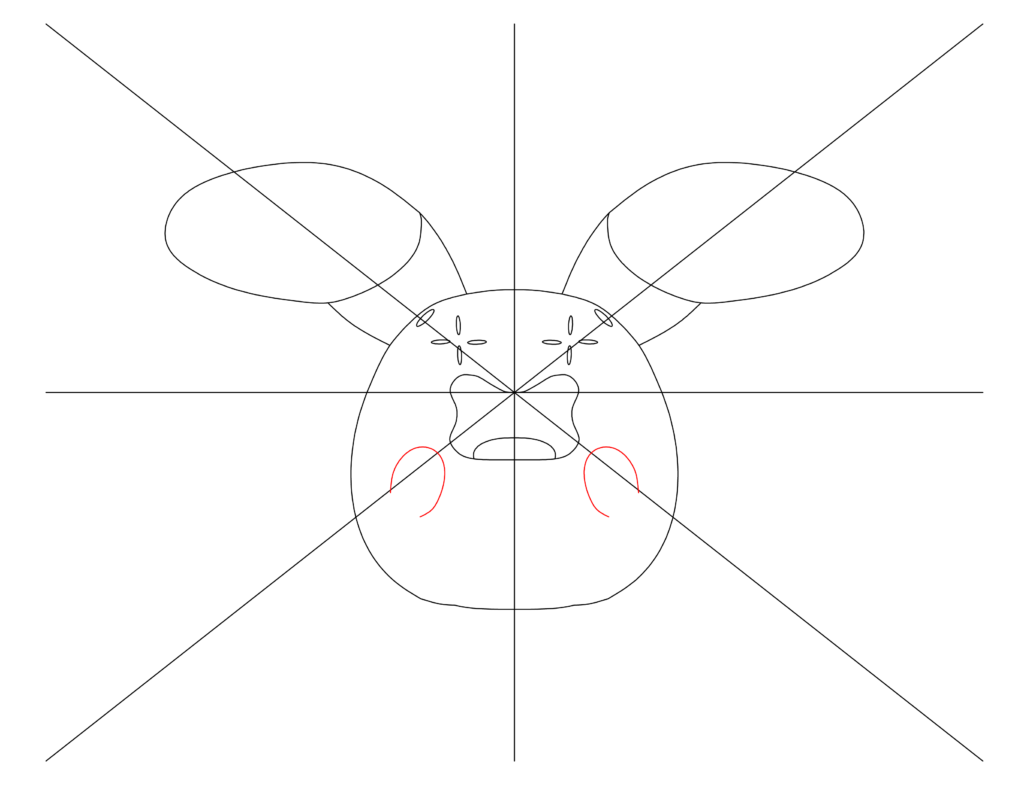
- We are almost there! Last pieces we need to add are Whismur’s feet. These are simple shapes. Use the guidelines for placement. Just oval shapes.

- Now our Whismur is almost done! We can remove the unnecessary construction lines and the overlapping lines. Our drawing has the lines we are removing as red.

- Now we are done! We can now color away!


 Previous Post
 Next Post